
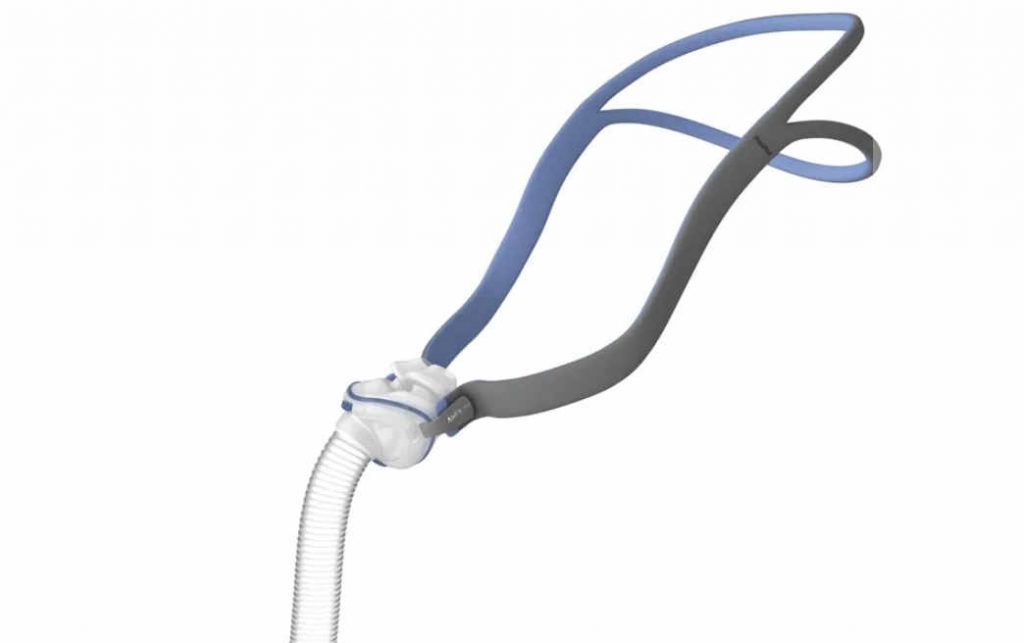
The purpose of this article is to show how one user of the ResMed CPAP P10 nose mask made the head straps adjustable, cut down the size of the harness to keep the top and back straps apart through the night, and added padding to prevent morning face lines.
As a long-time user of the ResMed CPAP machine I have tried many face masks. The one I have been using since it came out a couple of years ago is the Airfit P10. Or, as ResMed’s literature refers to it, the Nasal Pillows system.
I will refer to this as a “mask,” or “face mask,” but it is actually a nasal cannula because the business part goes into the nares, or nostrils, and there is no actual mask over the face. So even though I say “mask” you will know what I’m talking about.
I like this mask a lot but it does have a few drawbacks. One is the one-size-fits-all approach that has infected so many American products. The strap that attaches to the cannula of the P10 comes in only one size, as far as I know. ResMed does make an adjustable headstrap for the nasal pillows but for me it falls far short in the way it adjusts.
The nasal pillows themselves come in the three standard sizes that we have all been programmed to think of as enough choices to cover the whole world of whatever the product is: small, medium and large. Whether that narrow field of choices adequately covers the universe of different nose shapes and sizes, I have no idea. The “medium” works for me so I don’t dwell on it.
The harness, which as I mentioned comes in only one size, is packaged with a couple of little plastic thingies that are supposed be used to tighten the straps if they are too loose.
I tried a long time to get those things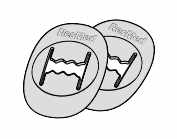 to work but never had very good results with them. I have never been able to get them to work the way ResMed says to use them; the straps just pull out of them. I’ve tried numerous other ways to use them, like tying them in knots in various ways. But that created uncomfortable lumps. And after the straps had stretched enough to require readjusting, the knots were hard to untie. Especially in the middle of the night.
So that’s the first problem. We need some way to easily adjust the straps, and to re-adjust when they have stretched too much to hold the nasal pillows snugly in position.
The second problem—these problems are not in any order, by the way—is the length of the strap. When it is not right for a particular head the over-the-crown part of the strap tends to slip down, wanting to join its twin strap at the back of the head. The back strap can also tend to slip upward.
The head strap is divided into two straps in its middle. The two places where the strap splits I refer to as a “Y.” The purpose of these two Ys is to provide a strap over the top part of the head and a strap behind the head down closer to the upper neck.
If the Ys are far back—that is, the sections of the strap between the cannula and the Ys are too long—the upper and lower straps won’t have enough of your head between them to keep them apart. This is for some people a second problem with the P10 headgear. The solution I have found for this is to shorten the strap at the cannula ends.
The third problem is that lines across the cheek can be caused by sleeping on one’s side. In my case these lines, caused by lying on the strap, would be quite prominent and sometimes would be visible all day. They could, I feared, become permanent. I don’t need any more lines on my face than I already have. This problem I have solved with pads, or cushions, the the cheek sections of the head strap.
When the CPAP head straps are too long
To deal with the first problem—some way to adjust the tightness of the straps on the head—I simply cut the bottom strap and added Velcro. Begin by removing the strap from the nose part. Here is the graphic from ResMed’s instructions showing how to do this.

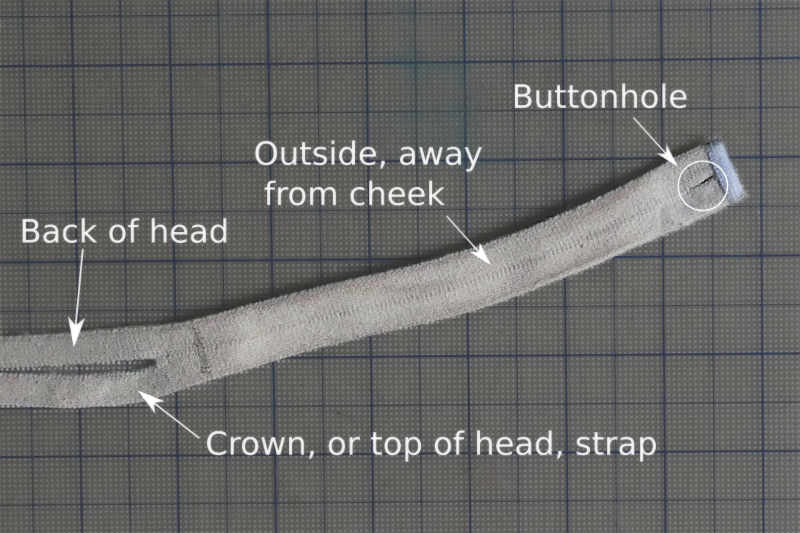
Figure 3 shows one end of the head strap removed from the mask. Both ends are the same. The end shown in Fig. 3 would be attached to the right side for use (but see caption).
The sides of the strap are different colors. The blue side goes next to your face and head, and the grey side is the outside. The older the strap the harder it is to identify these colors. Just remember that the buttonhole side of the strap is the outer side.
If you are modifying an older strap that has had some use, you will probably find that one of the two head straps is longer than the other. It is generally a good idea to cut that one and, when you are done, make sure it is on the bottom when you reattach the strap to the mask. If you need to shorten both the upper and the lower head straps then left-and-right is not an issue.
The straps are constructed of some sort of elastic material and I have found that cutting them with a knife is not easy. Scissors are.
Measure the strap you are going to cut and make a mark close to the middle if the amount of adjustment you need is not great. If you need you need significant shortening you may have to cut out a section from the middle with two cuts. That is, mark the middle and then make marks one-half the length of the section you will remove on each side of the middle mark.


Once you have made your cut, or removed sections from both straps, attach the Velcro.

I recommend you use a longer section of the loop part and shorter section of the hook part. Put the hooks on the side away from you head, the loops on the side facing your head. That way it should not scratch you in use. I suggest you use about a 3/4-inch piece of the hooks and 1½-inch for loops.
The Velcro tape I bought has adhesive on the back for sticking to cloth. It does “fix” after a while and be harder to pull off, but my wife sewed the pieces on to make them permanent. I can’t attest to the self-adhesion of the Velcro’s sticky back.
Be sure to cut the Velcro lengthwise to fit the head strap. If you don’t you may find it uncomfortable and tending to pull your hair out. If you are thick skinned and bald then it may not make any difference.

When the top CPAP head strap keeps sliding down
Due to the shape and slope of the back of my head, the top head strap was always a problem. Tight or loose, during the night it would repeatedly slip down to the level of the lower strap on the back of my head. When that happens it is impossible to get an air-tight fit of the cannula at the nose.
I would wake up several times during the night, mouth as dry as Denver air in winter, and have to move the strap back up to the top of my head.
I found the solution was to shorten the distance between the ends of the strap and the Ys. In other words, for me the Y was too far back and needed to be moved forward.

Cut the strap at the end of the buttonhole as depicted in figure 8. If you think the strap needs to be even shorter, adjust where you cut it accordingly. Use the end you just cut off as a guide to the location where you will cut the new buttonhole. HOWEVER–TWO CAUTIONS!
Caution one: Do not put the cut-off section on the absolute end where the cut is. Move it down an additional ⅛-inch or so. This is because your closure of the end is likely to take up more of the strap than did the original. So give yourself a little extra space.
Note: If after you have finished your modification and reattached the straps to the cannula you did not position the buttonhole ideally, you can fix it. If there is a wrinkle between the button and the end of the strap, the hole is too far from the end. Carefully make the hole longer toward the end. If the buttonhole is too close to the end, sew the buttonhole tighter and cut it an equal amount away from the strap end.
Caution two: Do not cut through both layers of the strap when you cut the new buttonhole. Put something like a popsicle stick inside the strap (it is a tube). That way you are cutting against a firm background and you will not cut through to the other side. I doubt that anything very drastically wrong would occur if you did happen to cut through the face side of the strap, but it is better not to.
Use a sharp, pointed knife to cut the buttonhole. The stuff of the P10 strap is tough. Make the buttonhole the same length as the original, or no more than about a quarter of an inch.
Once your buttonhole is made, and not before, sew up the end of the strap where you cut off the end. You can do the sewing by hand or with a sewing machine.
Make sure you have at least about an eighth of an inch from the end of the buttonhole to the closure on the end (that you just made by sewing it up).
Repeat on the other end of the strap.
When the CPAP strap creases your face from sleeping on your side
One of the nice benefits of sleeping with a CPAP machine is that it allows you to sleep on your back. Some people, however, never sleep on their back. And those of us who do, don’t do it all night.
Most of us spend at least a portion of our time sleeping on our side, and that means the P10 strap is going to be between your face and the pillow. And that in turn means you are likely to wake up with a crease on your cheek that looks something like a dueling scar.
Fixing this problem is fairly simple. All you need is a cushion on the cheek section of the P10 strap.
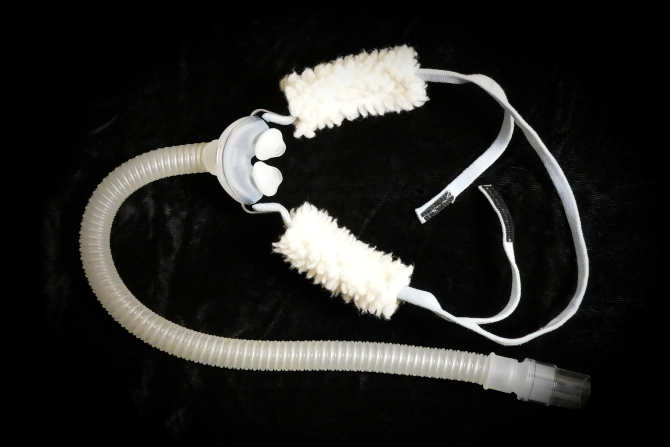
As you can see in figure 9 I have added face cushions to the cheek section of each side of the strap. The cushions pictured here are made of fleece fabric and I have to say they are a bit too much. The fleece fabric is fuzzy and tickles my sensitive skin, so wife Christine made two new ones from a less fuzzy fabric. But the procedure is the same regardless of which material you use.
Begin with your chosen piece of fabric about 3 inches long and 2 inches wide. (You will duplicate these instructions for the second cushion.)

With the material inside-out and folded in half, sew a seam along the length of the material forming a loop or tube that is about ½ inch on the inside. It can be less (tighter) than this, but not by very much. Trim as much of the excess material as possible without damaging the seam.
Feed the tube through itself to turn it right-side out, putting the seam inside the tube so it will be away from your face when in use.
Now thread the end of the face strap through the tube.

Repeat for the other end of the head strap and your P10 should now look something like the headgear in figure 9.
Your head strap (straps, if you did both the top and back strap) is now adjustable. You have probably discovered that there is range of tightness that is best; not too tight, but tight enough to prevent leakage around your nose. You will find this much easier to achieve with this new, easier method of adjusting the straps.